VMware User Environment Manager (UEM) offers personalisation and dynamic policy configuration across virtual, physical and cloud-based Windows desktop environments. It simplifies greatly the end-user profile management.
VMware User Environment Manager does not require any special infrastructure. A couple of file shares, some group policies, a UEM Agent, a UEM management console and a UEM application profiler machine are the only components needed. The installation takes only 15 minutes.
Create UEM Configuration Share
To create the UEM configuration share and to set the permissions on NTFS and share level correct, you can execute the following commands from a command prompt on the fileserver (Run as administrator)
md D:\VDI\UEMConfignet share UEMConfig$=D:\VDI\UEMConfig /grant:domainname\eucusergroup,READ /grant:domainname\eucadmingroup,CHANGEicacls D:\VDI\UEMConfig /inheritance:ricacls D:\VDI\UEMConfig /grant domainname\eucusergroup:(OI)(CI)RXicacls D:\VDI\UEMConfig /grant domainname\eucadmingroup:(OI)(CI)Ficacls D:\VDI\UEMConfig /remove Administrators |
Notes:
- The domainname\eucusergroup referenced in the above commands is an Active Directory group containing all the user accounts that will be using UEM.
- The domainname\eucadmingroup referenced in the above commands is an Active Directory group containing all the user accounts that will be managing UEM.
- I chose to create the repositories on the D: drive of the fileserver, but this could of course be any drive of your choice
- I also chose to create hidden shares ($), but this is not a necessity to do this
Create UEM Profile Archive Share
To create the UEM Profile Archive Share and to set the permissions on NTFS and share level correct, you can execute the following commands from a command prompt on the fileserver (Run as administrator)
md D:\VDI\UEMProfilesnet share UEMProfiles$=D:\VDI\UEMProfiles /grant:domainname\eucusergroup,CHANGE /grant:domainname\eucadmingroup,CHANGEicacls D:\VDI\UEMProfiles /inheritance:ricacls D:\VDI\UEMProfiles /grant domainname\eucusergroup:(NP)(RX,AD)icacls D:\VDI\UEMProfiles /grant domainname\eucadmingroup:(OI)(CI)Ficacls D:\VDI\UEMProfiles /grant "CREATOR OWNER":(OI)(CI)Ficacls D:\VDI\UEMProfiles /remove Administrators |
Notes:
- The domainname\eucusergroup referenced in the above commands is an Active Directory group containing all the user accounts that will be using UEM.
- The domainname\eucadmingroup referenced in the above commands is an Active Directory group containing all the user accounts that will be managing UEM.
- I chose to create the repositories on the D: drive of the fileserver, but this could of course be any drive of your choice
- I also chose to create hidden shares ($), but this is not a necessity to do this
Install VMware UEM FlexEngine Agent (on your VDI golden image)
msiexec.exe /i "\\fileserver\Software\VMwareUserEnvironmentManager\9.2\VMware User Environment Manager 9.1 x64.msi" /qn INSTALLDIR="%ProgramFiles%\UEM\Flex Profiles" ADDLOCAL="FlexEngine" |
Note:
- The above assumes that the software binaries are located on \\fileserver\Software\VMwareUserEnvironmentManager\9.2\
Install VMware UEM Application Profiler (On a reference VDI)
msiexec.exe /i "\\fileserver\Software\VMwareUserEnvironmentManager\9.2\VMware User Environment Manager 9.2 x64.msi" /qn INSTALLDIR="%ProgramFiles%\UEM\Application Profiler" |
Note:
- The above assumes that the software binaries are located on \\fileserver\Software\VMwareUserEnvironmentManager\9.2\
Install VMware UEM Management Console
msiexec.exe /i "\\fileserver\Software\VMwareUserEnvironmentManager\9.2\VMware User Environment Manager 9.2 x64.msi" /qn INSTALLDIR="%ProgramFiles%\UEM\Flex Profiles" ADDLOCAL="FlexManagementConsole" LICENSEFILE="\\fileserver\Software\VMwareUserEnvironmentManager\9.2\VMware-UEM-9.2-GA.lic" |
Note:
- The above assumes that the software binaries are located on \\fileserver\Software\VMwareUserEnvironmentManager\9.2\
Configure VMware UEM Management Console
Execute C:\Program Files\UEM\Flex Profiles\Flex+ Management Console.exe
- Personalisation Features: Select all
- Additional Features: Select all
- VMware UEM Easy Start Configuration
- Click Easy Start button
- Select Desired Office versions
Configure VMware UEM Group Policies
- Copy the .admx template files supplied with UEM to %systemroot%\policyDefinitions on your Active Directory Server (also copy the files located in the en-US folder to %systemroot%\policyDefinitions\en-US)
- Open Group Policy Management Console on your Active Directory Server: gpedit.msc
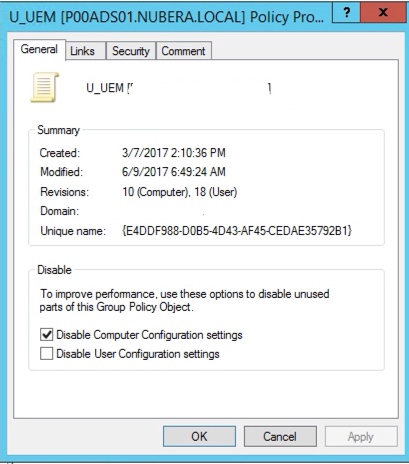
- Create a new GPO on the OU where users are located for which you want to configure FlexEngine (e.g. U_UEM)
- Disable Computer Configuration Settings on the GPO as this GPO will only apply to the User settings
- Go to “User Configuration – Administrative Templates – VMware UEM – FlexEngine” and configure the following settings

-
- Application blocking logging in the Windows event log (optional)
- Enable
- Flex config files
- Enable
- Central location of flex Config files: \\fileserver\UEMConfig$\General
- Process folders recursively: YES
- FlexEngine logging
- Enabled
- Path and name of logfile: \\fileserver\UEMProfiles$\%username%.%domainname%\logs
- Log level: Warn
- Maximum log file size in Kb: 512
- Log total size of profile archive and profile archive backup folders: YES
- Profile archive backups
- Enable
- Location for storing user profile archive backups: \\fileserver\UEMProfiles$\%username%.%domainname%\backups
- Hide backup folder: NO
- Number of backups per profile archive: 5
- Create single backup per day: YES
- Profile archives
- Location for storing user profile archives: \\fileserver\UEMProfiles$\%username%.%domainname%\archives
- Hide profile archive folder: NO
- Compress profile archives: YES
- Retain file modification dates: YES
- Run FlexEngine as Group Policy Extension (strongly recommended to enable this setting. If you choose not to do so, you must configure FlexEngine to run from a logon script)
- Enable
- On a GPO applied to all computer objects
- Go to Computer Configuration – Policies – Administrative Templates – System – Logon
- Enable “Always wait for the network at computer startup and logon”
- Show VMware UEM logon and logoff progress information (optional)
- Enable
- Application blocking logging in the Windows event log (optional)
- Go to “User Configuration – Policies – Windows Settings – Scripts” and configure the following settings
- Logoff:
- Script Name: C:\Program Files\UEM\Flex Profiles\FlexEngine.exe
- Script Parameters: -s
- Logoff:
References
Installing and Configuring VMware User Environment Manager
Pingback: VMware User Environment Manager 9.2 – Components – ITuDA